You normally start a new eclispe java project, let’s name it TestPrologInterface (see Figure 1 below).
To use JPL you need to import the jar file in your project. You right-click on the project’s name and click on Properties (or from the Eclipse menu bar you select Project->Properties). Then on the Libraries tab you click on the Add External JARs… button and select the jpl.jar (see Figure 2 below).
Then, you can add a new class and paste in the code from my previous blog entry (see Figure 3 below).
Subsequently, you will need to setup a run configuration for executing/debugging your project. To do that you select on the Eclipse menu bar the Run->Run Configurations… option, then you right-click on Java application and select New. Then you add the names of the project and main class (see Figure 4 below).
The next thing to do is define the right environment variables. To do that you need a command prompt where you will execute the command:
"c:\Program Files\swipl\bin\swipl.exe" --dump-runtime-variables=cmd
See the resulting environment variables in Figure 5 below.
Now you are ready to configure the variables on eclipse. In the run configuration go to the Environment tab and then add the variables one by one (click Add and insert the information from the previous screen, from each line the left hand side as name and the right hand side as value). You can see the results in Figure 6 below.
Finally, you run the configuration by clicking on Run (bottom right). The result is shown at the bottom of Figure 7, where you see the eclipse screenshot including the source code.
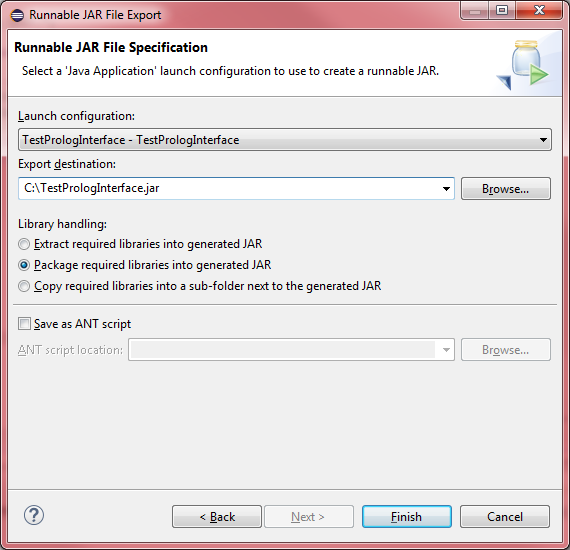
If you want to export the project to a runnable jar file you right click on the project name and select Export. In the dialog that opens you select Java->Runnable jar file. In the next dialog you define the name of the exported jar and don’t forget to check the Package required libraries into generated JAR if you want the jpl.jar file to be included (see a screenshot in Figure 8).
Now you are ready to distribute your application. Distribute it with the batch file that I used in my previous blog entry.
Figure 1: Create a new project dialog
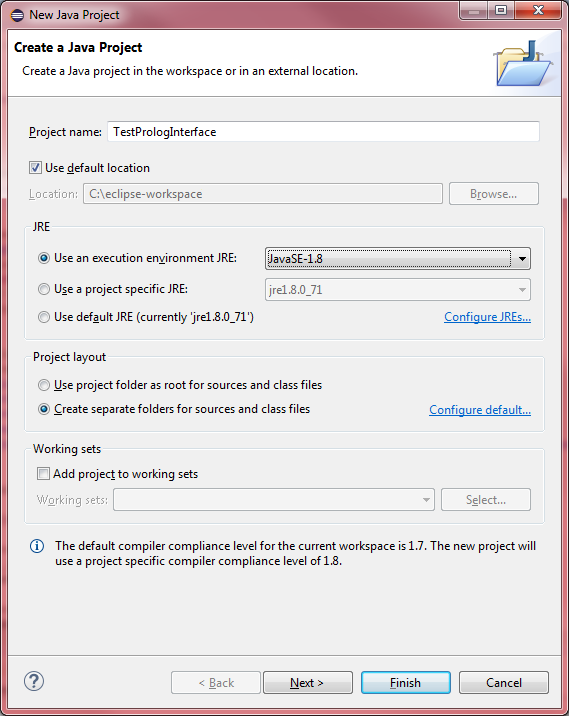
Figure 2: Add the JPL JAR file to library
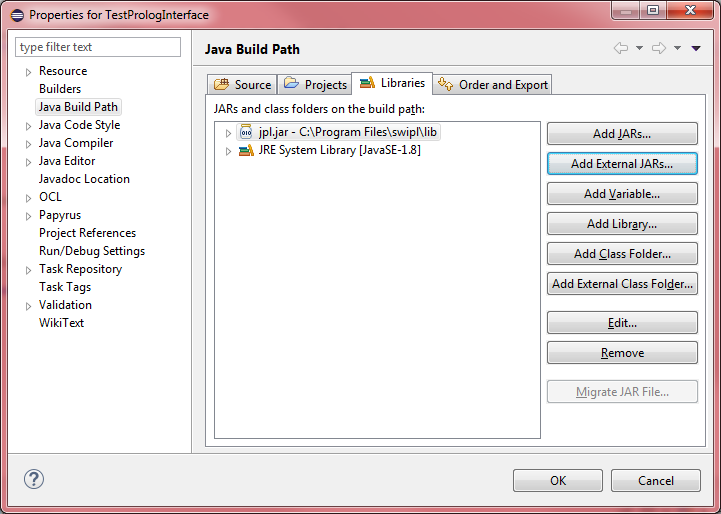
Figure 3: New class dialog
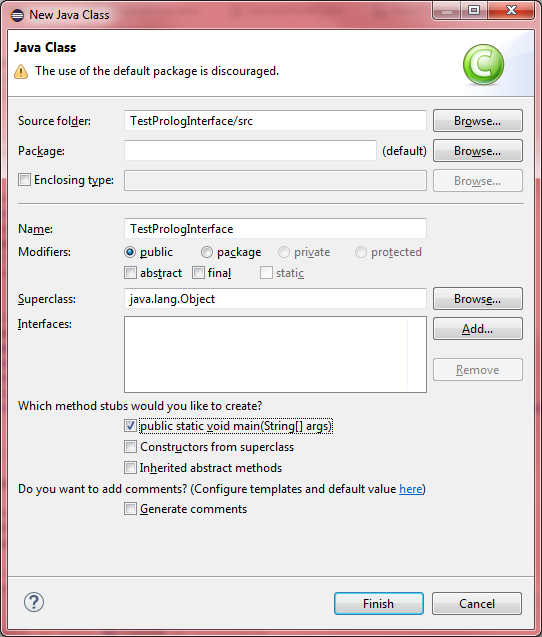
Figure 4: Create a new run configuration dialog
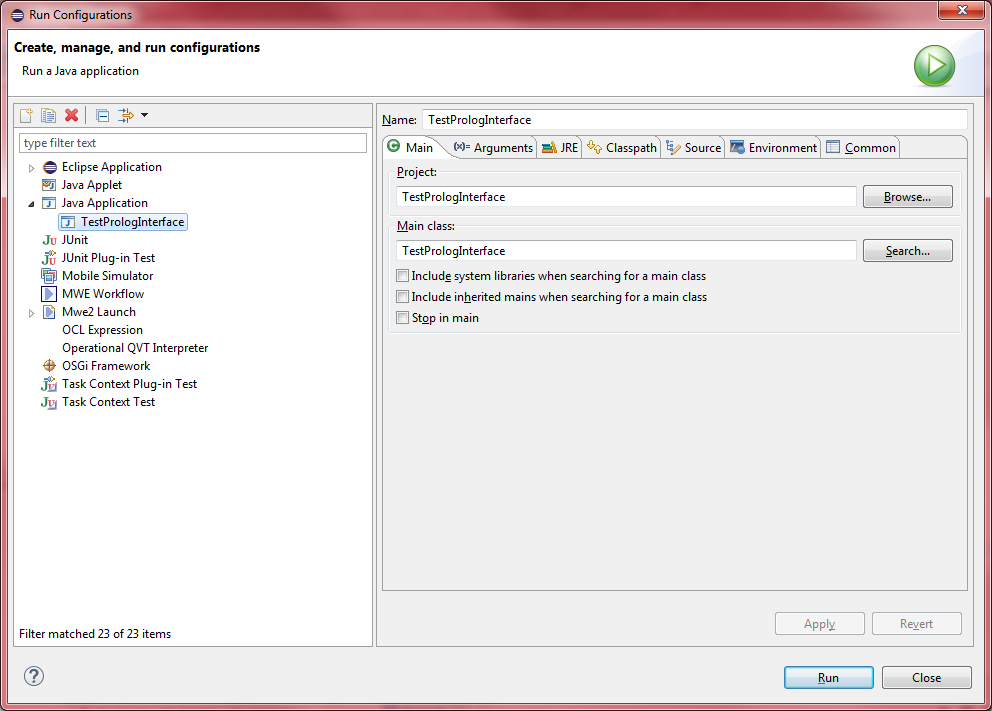
Figure 5: Using the command line to find the SWI-Prolog environment variables
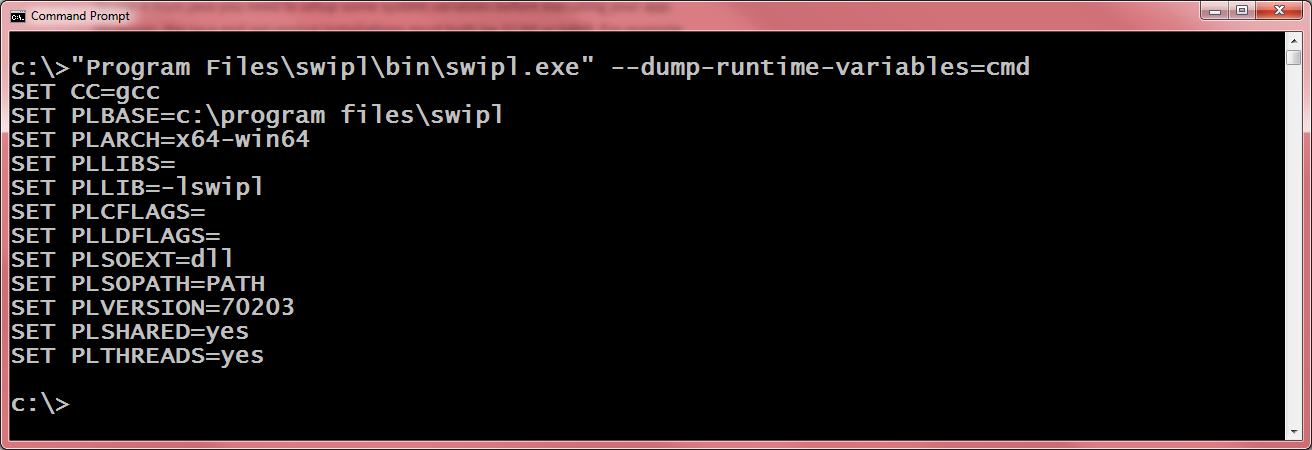
Figure 6: The environment tab in the new run configuration dialog
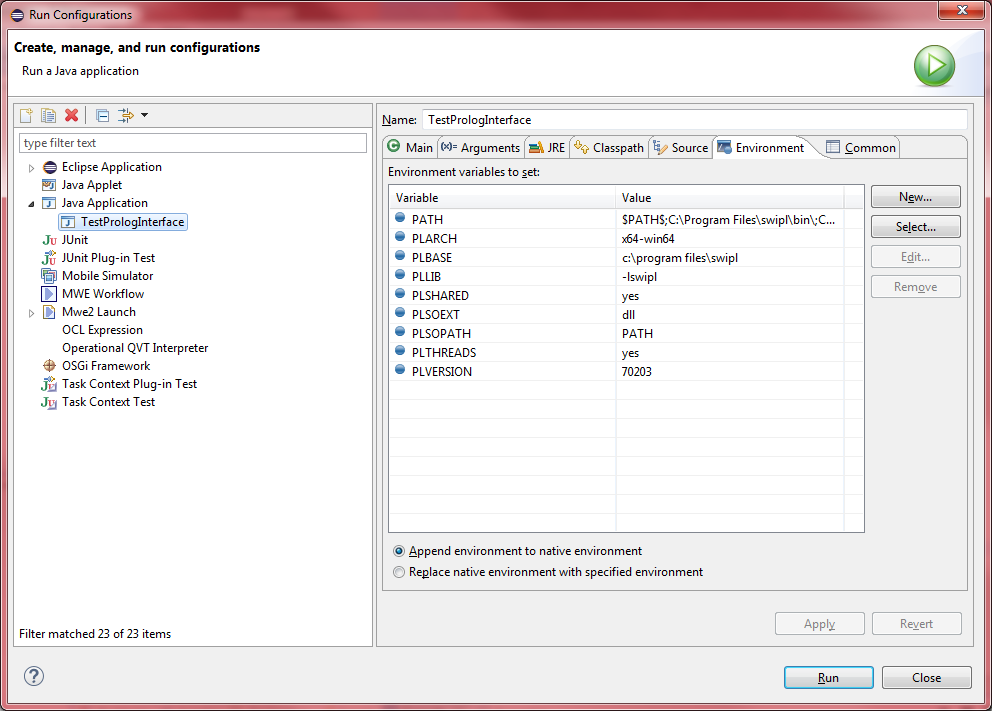
Figure 7: The java class and the execution output
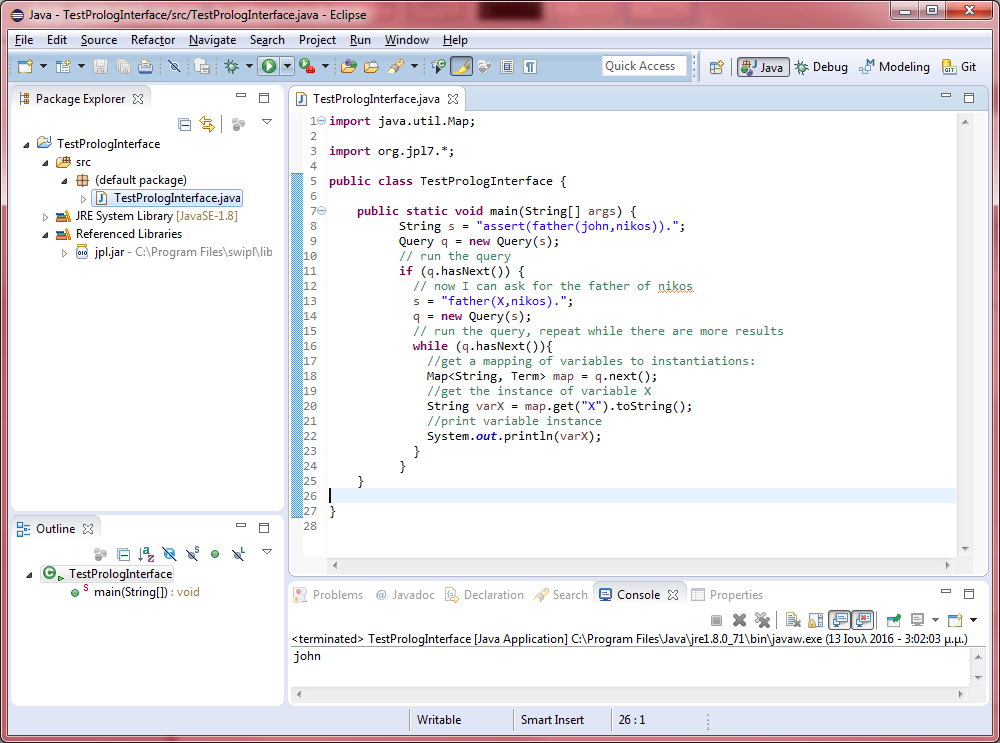
Figure 8: The runnable JAR export dialog